Friday 17 September 2010

New Donnigton 100 years war in 15mm at Colours 2010


Following our regular club meeting on Saturday several of us travelled to Newbury on Sunday to visit "Colours".
I have attended this show for many years and it continues to be a good day out, at an easy to get to venue, with good games and traders.

Whilst browsing the show stands at the end of the day I was attracted to the Donnington stand as I still toy with the idea of putting together a 15mm Wars of the Roses collection. It was then I spotted these beautifully painted minis and I thought you might like a look.


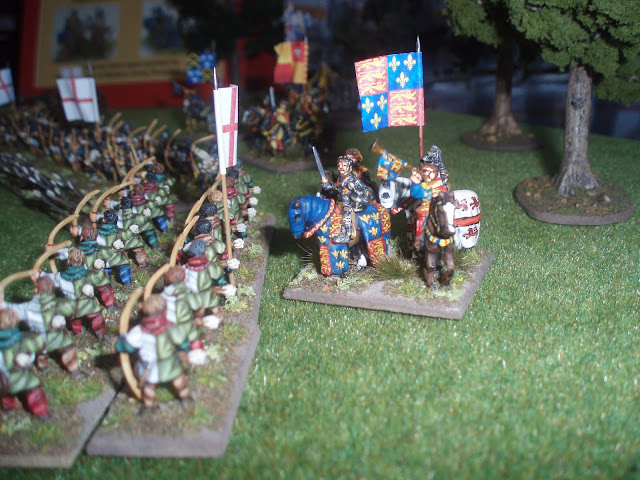
These models were also featured in Wargames Illustrated.

Very Nice!!

September Game, Tel el Eisa

Battle of Tel el Eisa First Alamein 1942

Steve M held a FOW desert clash between the Ausies of 9th Australian Infantry Division and the Italian Sabratha Division supported by elements of Afrika Korps.


This battle represented the crumbling attacks carried out by General Auckinleck to hold Rommel's forces in a battle of attrition, forcing him to commit his mobile armoured reserves to bolster his Italian allies.


Auchinleck attacked again on July 10 at Tel el Eisa in the north with the fresh 9th Australian Division. 89 Germans of the 621st Radio Intercept Company and 835 Italian troops that were largely part of an infantry battalion and artillery group of the "Sabratha" Division were taken prisoner by the Australian 2/48th Battalion under Lieutenant Colonel H. H. Hammer. A battalion of the Italian Bersaglieri was committed to plug the gap and initially recovered some of the lost ground at Tel el Eisa and even took 13 prisoners. According to the 2/48th Battalion diary: "[a]t approx 2000 hrs enemy tks-number unknown-and inf attacked D Coy front. They overrun posn and enemy inf forced D Coy to withdraw and occupied their psn."[18] While the Bersaglieri suffered heavy losses, it bought time to allow the Italian XXI Corps to rush in a battalion of the "Trieste" Division and L3 and M13/40 tanks of the 3rd "Novara" Armoured Group and Major Gabriele Verri's 11th Armoured Battalion to affected sector and seal off the Australian breakthrough.[19]

The picture below shows the initial Italian position upon their ridge with wire out front. As in the original action the Aussies attacked at night struggling to get their vehicles up to the ridge without bogging in the broken terrain.


The position was penetrated on the Italian left, but the leading Aussie platoon was destroyed carrying the position.The ridge was consolidated by the Crusader and a follow up infantry platoon, both having doubled to get to the ridge.


On turn 6 the German armour with Bersaglieri infantry turned up and we ended up with a historical result, with Aussies on the ridge but unlikely to penetrate the position further. However the German commander had been forced to bring up the Panzers, losing a Panzer IIIJ for his pains.


Good game Steve, a very enjoyable encounter.