 |
| Major General (Gentleman Johnny) John Burgoyne |
The Saratoga Campaign of 1777 is a fascinating campaign for wargamers to look at for the "what ifs" the war along the Hudson River throws up when looked at with the benefit of two hundred and thirty seven years of hindsight. The campaign, devised by George Sackville, Lord Germain, Secretary of State for the Colonies, was a low point in British strategic military planning.
The campaign lead to the French intervening in the American War of Independence, as well as revealing the military talents of a certain Benedict Arnold, who, through his leadership, was a major factor in driving the American forces to their eventual victory in the campaign. His subsequent fall from grace has probably led to his obvious talents for leadership having been overlooked in the intervening years, and his lack luster performance wearing the redcoat of his former enemy leaves us with a rather enigmatic character from this period of history.
Thus it was that the AWI 15mm collection came out to re-fight the pivotal battle of the Saratoga Campaign, The First Battle of Freeman's Farm, using the Seven Years War/AWI Module from Carnage & Glory (C&G), a computer moderated set of rules designed for this period. More information and thoughts on using C&G II for historical games are on
JJ's Wargames where I have lots of posts looking at using the rules and scenario downloads containing the files to play the games we have reported on, including this one. In addition you can find more information about the rules on the
C&G Yahoo Group and you can get a copy of the various rule set modules from the
Carnage & Glory Website
The scenario was based on the events of the battle with an approximation of the forces involved with the setup based on the map below. Thus we had General Hamilton's Wing deployed around Freeman's Farm, facing Colonel Morgan's and General Poor's Wings emerging from the treeline. On the British right we deployed General Fraser's Wing in column of route able to move after turn one, and opposite them on the American left flank was General Learned's Wing again emerging from the tree line. Off table and able to test for arrival was General Riedesel's Wing whose units would arrive on the American right flank, each unit needing a 5 or 6 on a D6 to arrive from turn two. The orders of battle show the commands in detail including their formation at the start.
 |
| Major General Benedict Arnold |
The objective for both sides was simple, cause as much damage to the other army whilst limiting the damage to your own forces and take and hold Freeman's Farm, uncontested (i.e. no enemy units under command within charge range) with at least two units under command. We deem being "under command" as units in good order. The holding of the farm at the end of the game would shift the result one level in favour of that army, the end being determined by C&G when the respective army morale's fell below 75%. Thus a "Major Victory" for either side would fall to a "Minor Victory" on failure of that side to control Freeman's Farm.
 |
| General Hamilton's wing in and around Freeman's Farm await the Americans |
With the relatively small size of this battle, forces and terrain, I set the the scale at one inch to 25 paces, a pace being 27 inches. This meant that most of the artillery action was in canister range and the forces got into action quickly with the centre wings swapping rifle and artillery fire from turn one.
 |
| General Fraser's wing approached the battle on the British right flank |
The Americans aware of approaching British units were keen to press their numerical advantage quickly and the fight for Freeman's Farm was heralded by fire from Morgan's Riflemen dropping several redcoats manning the fences being answered by canister fire from the Royal Artillery repaying the compliment on the riflemen and their supporting Continentals.
 |
| General Learned's wing on the American left flank |
Meanwhile, General Learned's Continental Wing, on the American left flank, was keen to cross the open ground to their front and gain the cover of the next line of trees before General Fraser could occupy them.
 |
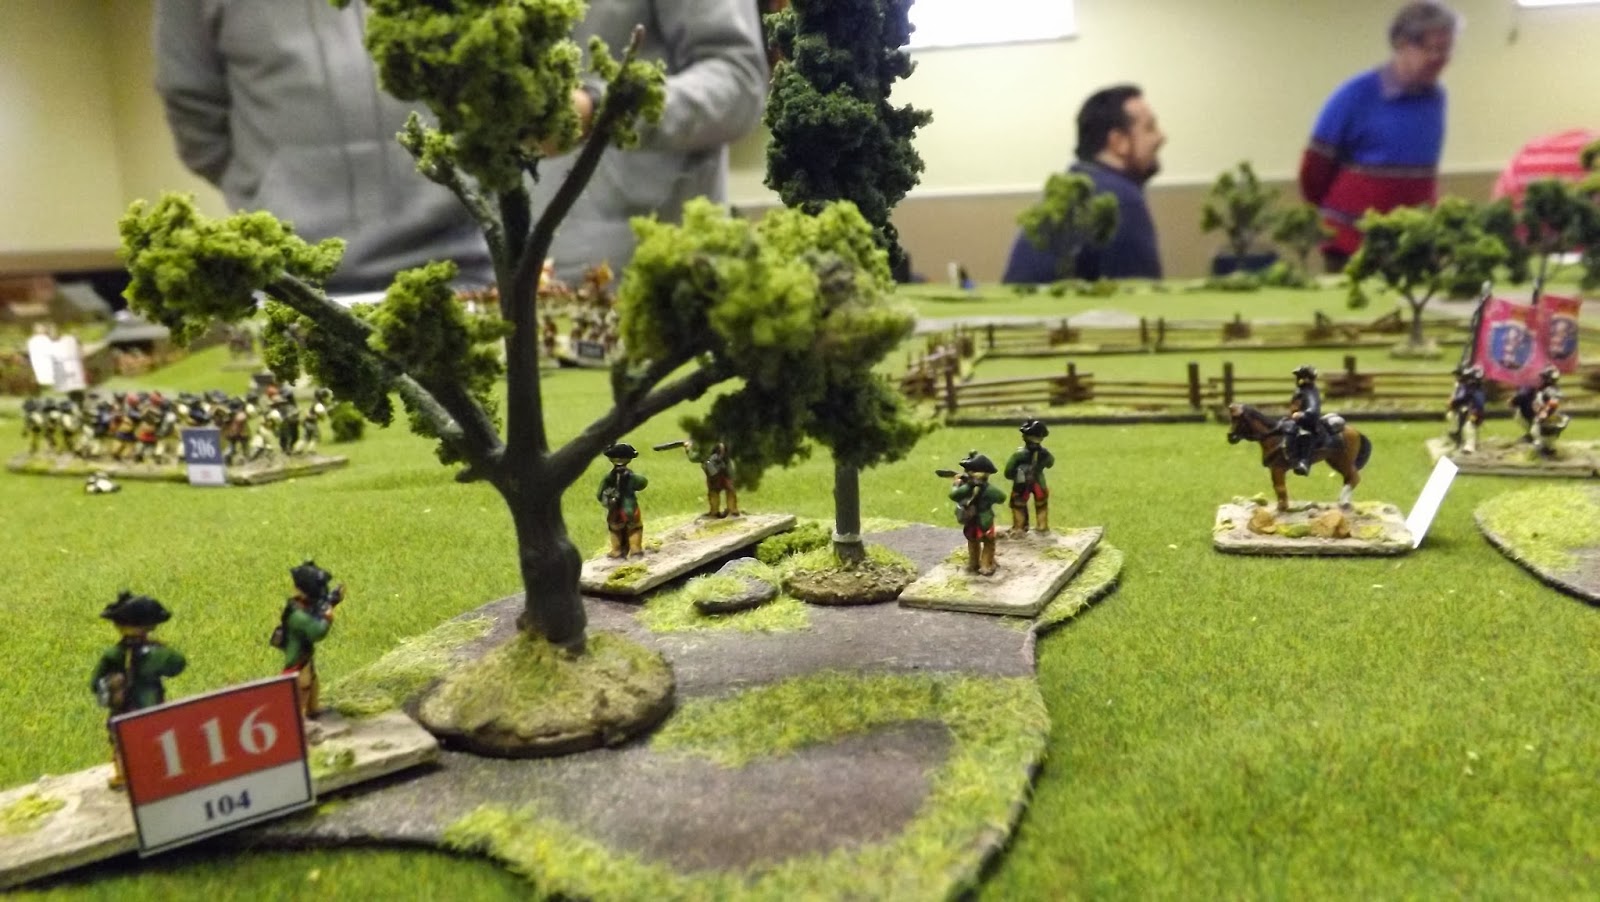
| General Arnold oversees the attack on Freeman's Farm |
Unfortunately for Learned's men they were greeted by desultory musket fire from a group of fifty Indians who were scouting ahead of Fraser's columns. The 2nd Massachusetts halted, presented arms and poured a volley into the treeline dropping ten of the Indian warriors. To the amazement of all of us the Indians stood and were ready to carry on the fight next turn, thus buying General Fraser's men invaluable time as they deployed ready to contest the American advance.
 |
| General Poor's wing attacks the small hill next to Freeman's Farm |
The fight around Freeman's Farm didn't take long to "hot up" as Morgan's Riflemen and Dearborn's Light Infantry fell back behind the New Hampshire and New York Continentals, and the lines of British and American regulars started to trade volleys. The fight was a close affair as the British had the quality in training but the Americans had numbers and staying power, and it was too close to call.
My son Tom was commanding the British centre and displaying his skill developed using the Napoleonic module for C&G, he started to pull back his front line of British infantry behind their supports to replace them with his second line through skillful passage of lines. However these British battalions were battalions in name only and with about 250 men each they simply couldn't take the damage being dished out in this maelstrom of musketry. In desperation the Royal Artillery attempted to support their infantry by deploying to the flank of the American Wing and General Burgoyne stayed close at hand to aid General Hamilton in his task of keeping the ranks steady.
 |
| The 1st Connecticut Militia look on as the fight for Freeman's Farm intensifies |
The British looked to their left flank for any sign of General Riedesel's Brunswick battalions and on the first turn of asking were pleased to see the General arrive in the treeline with his advance guard of riflemen. The Americans were under pressure to get the job done before the Germans could intervene and mess things up.
 |
| General Riedesel arrives on the American right flank with Regiment von Rhetz |
 |
| Brunswick riflemen enter the woods on the American right flank |
Meanwhile back at Freeman's Farm the new British front line was starting to reel under the musket and rifle fire coming at them. Only the 9th Foot in the farm itself remained steady in their light cover, and General Burgoyne keen to "steady the ship" moved forward and attached himself to the 62nd Foot on the hill to their left. Suddenly a volley from the New York Continentals ripped in to the 62nd and General Burgoyne was seen to fall from his horse, mortally wounded by a shots in his arm, spluttering bloody commands, he was carried from the field by his staff and General Hamilton was left to deal with matters alone.
However the toll of battle was taking its effect on the American centre and the three Continental battalions were refusing the entreaties of their officers to advance on the British and end the fight for the Farm.
 |
| The fire fight is deadly around Freeman's Farm leading to General Burgoyne being mortally wounded |
In addition to problems in the centre the American left flank was facing an even stiffer challenge from General Fraser's column as, taking advantage of the brave resistance put up by his Indian allies, the British Composite Grenadier and Light Infantry battalions entered the tree line to meet the Americans. As the 2nd Massachusetts and 1st Canadians attempted to enter them in the wake of the routing Indians, they were met by crashing volley fire from the two elite battalions. Returning a desultory volley in return, they attempted to charge in, only to be met by Grenadiers and Light Bobs charging out. The American front line recoiled as the British emerged yelling their war cry from the tree line, falling back through the 8th and 9th Massachusetts, disordering them in the process.
 |
| General Fraser assaults the lead units of General Learned's wing led by British Lights and Grenadiers |
Again the British commander looked to his left flank to see if General Riedesel was coming on in force and was relieved to see yet another unit arrive behind the riflemen. The Regiment von Rehtz, quickly deployed into a three rank line and advanced towards Dearborn's Lights and the 1st Connecticut Militia.
 |
| Regiment von Rhetz helps Shepperd the American army off the field of battle |
 |
| General Burgoyne's staff attempt to rally General Hamilton's wing around Freeman's Farm |
The British centre was in disarray, with the 20th and 62nd foot broken and dispersed following the fight for the farm and General Burgoyne dying behind the lines, only the 21st Foot in good order were available to secure the position. Even the 9th Foot, in the farm itself, were becoming unsteady as they found the buildings infiltrated by Morgan's Riflemen who kept sniping their officers and NCOs as they struggled to maintain order. However the fight had stymied any attempt by General Poor's men to take advantage as they had to look to their right as General Riedesel started to make his presence felt, not, however, without getting himself wounded, with a shot to his leg, in the process.
 |
| Having repulsed the American left General Fraser organises support for the British centre |
The finale to our battle came with the final attack by General Fraser's elite battalions as, after redressing their ranks, they charged into the 8th and 9th Massachusetts battalions still disordered after being retreated thorough by the 1st Canadian and 2nd Massachusetts. Both the Lights and Grenadiers delivered a moving volley as they gave three hurrahs and charged forward. Neither of the two Continental battalions returned the fire and retreated through their broken comrades off the table taking their colleagues with them and causing them to disperse in the process.
 |
| General Hamilton's forces start to fall back |
 |
| The Connecticut Militia in reserve |
These final dispersals to both armies effectively ended the game as both forces morale dropped below 75%, 72% for the British and 62% for the Americans. We had fought six turns of combat, one and a half hours of fighting, and the British had achieved a Major Victory, this was confirmed as Freeman's Farm was contested at game end.
 |
| The Brunswickers hold the field. |
The Butcher's Bill shows how hard fought our battle was with General Hamilton's battalions gutted in the fight for the farm, but with massive damage inflicted on both Generals Poor's and Learned's wings each suffering two units dispersed in the battle. Off course in a campaign situation, the Americans would replace those losses quite quickly, the British would not. In addition the death of Burgoyne would probably lead to an earlier surrender by the new British Commander given the situation he would now face.
Honours went of course to the British Grenadiers who were unstoppable once unleashed in the charge and to Morgan's Riflemen who were everywhere in the battle inflicting casualties as they went.
W denotes No Advance
R denotes Halt or Retire
Y denotes Routing
D denotes Dispersed or removed from the field
Thanks to Tom, Steve L. and Ian for a very entertaining afternoon of war in the colonies.


