 |
| Young Charle commanded the British airborne troops, watches closely as the Germans start to deploy on their end of the Benedendorpsweg |
The following are the British and German briefings take from the Lardies Xmas Special 2007, with my commander stats. amendments for IABSM3.
British Briefing
Major Buchanan has informed you that you can expect Jerry to put in an attack down this road.
If they manage to push you out of this position its likely that the whole of the Oosterbeck position will be encircled and no escape possible. You certainly don’t fancy spending the rest of the war in a POW camp, so you reckon that seeing it through here, whatever the outcome, is the best bet.
Some boys from 11 Para are in the houses around you, but they look to be a shaky lot, mind you, they've been fighting for three days solid so they’re probably just exhausted. If they can keep the enemy "pongos" off your back you’ll deal with any Jerry armour that comes along.
Hopefully you’ll stick it out.
IABSM3 Forces
South Staffordshires
Lance Sergeant Jack Baskeyfield, Level II Commander
Two six pounder anti-tank guns, four crew each.
11 Para
Corporal Bill Stickers Level II Commander
Three sections of eight men
One PIAT with two crew.
 |
| View towards Baskeyfield's position on the Acacialaan junction from behind the StuG seen in the picture above |
German Briefing
It has been a tough few days, the Red Devils fight like…Devils! Now, however the end is in sight. In Arnhem the positions by the bridge are being reduced, and to the West at Oosterbeck the enemy is close to surrender.
Our orders are to attack down the Benedendorpsweg. If we control that road we will remove the Englanders’ only secure flank and have them surrounded. Then, at last, we can get some rest!
Do not flinch, push home your attack with energy and vigour and the enemy will collapse as a pack of cards.
IABSM3 Forces
Erzatz Infantry Company
Sturmscharfuhrer Artur Spengler Level III Commander
Unterscharfuhrer Rolf Wolozowski Level II Commander
1st Platoon
Three rifle squads, 8 men each
2nd Platoon
Three rifle squads, 8 men each
Mortar Section
Two 80mm mortars, one FOO may be on table
Assault Battery
Scharfuhrer Alois Schatz, Level III Commander
Three StuG III, Grade III morale
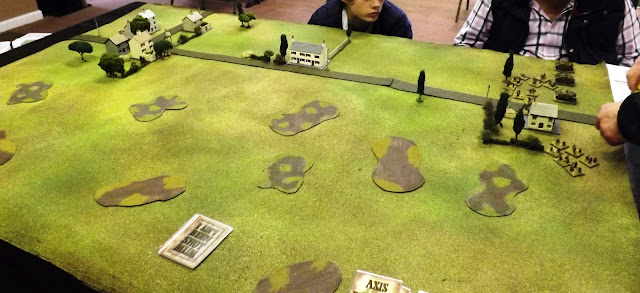 |
| The table this side of the road borders the river bank and is difficult going for vehicles and foot troops. The IABSM card deck is assembled and ready to go with the first German units moving on to the table |
The British win if they keep the road junction in their hands, the Germans win if they capture the junction. As in reality both sides have the assets that are available, time is not an issue.
That said, if the Germans loose all three StuGs while the British still have at least one 6 pounder in action then they may call for additional support. Add a reinforcements card.
Roll each turn, requiring a 6.
Note: I had on hand a StuH42 and an SdKfz10/4 20mm half-track in the German reserve should the reinforcements have been needed.
With the British positions marked on a copy of the map above, the card deck was assembled (note IABSM is a card driven rule set with individual platoons, commanders and other assets able to activate and perform actions such as moving, spotting and shooting on the turning of their respective cards) and with initially more German cards in it, the first German units were activated and on the table.
These first moves were not without problems as the German card deck included "Hesitant Troops" which meant the next German unit card drawn would be subject to hesitant status and forced to remain in situ either spotting or firing according to what was possible.
 |
| One of the SP Guns engaged by Baskeyfield was this SdKfz 10/4 half-track mounting a 2cm gun beside the northern pillar of the blown railway bridge (see map above) about 900 yards from his position on the road junction pictured here by Dutchman Dick Renes in 1945. |
Knowing from their briefing that British Paras were holding the road junction ahead but kept deliberately in the dark as regards force make up and with no blind markers on the table the German commanders were understandably nervous as they ordered their troops forward; and the StuG commander took every opportunity to blast the nearest cover with HE fire as they conducted a moving recon by fire.
 |
| SS Ersatz Kompanie Spengler moves out into the polder land |
Knowing also that the terrain south of the road and close to the river bank was muddy and difficult terrain, cautiously decided to keep the StuGs on the northern side supported by a platoon of trainee SS infantry recruits, leaving the other side to the second platoon of infantry the whole force backed up by the mortar FOO and his two 81mm mortar section.
 |
| Sturmgeshutze-Brigade 280 lead the "hesitant" SS trainee soldiers forward |
For Charlie our British commander it was a question of holding his nerve to allow the German troops to get close enough before deciding to open up with a telling barrage of anti-tank and small arms fire.
As the German armour drew level with the house on the centre line of our table, now burning fiercely from a severe "brassing up" by the StuG's, they started to bring their main guns to play on the forward houses at the road junction, suspecting their occupation by British Paras.
 |
| The SS men were naturally cautious and took time to "brass up" likely enemy positions on their approach. Note the mortar FOO on the road searching out likely enemy positions. |
 |
| An SS Infantry Zug advances across open ground devoid of much cover |
The British Paras were indeed spread among the various houses, keeping their heads down and holding their fire. As the first of these houses caught fire under the bombardment, the British commander decided to open up in reply and Baskeyfield directed his first 6lbr gun to open up on the line of StuGs, managing to not only get his gun card out once but swiftly follow it up with his bonus fire card allowing the gun to activate twice in the round.
 |
| As the StuG's open fire on the first line of buildings they themselves come under punishing AT fire from the front right |
Suddenly the three StuG's were caught in a hail of 6lbr armour piercing shells and were desperately fending off the "7" gun strike factor of the 6lbr with the "7" armour defence factor of the StuG.
This meant that each time a vehicle was hit the British commander would roll seven d6 needing 5 or 6 for a successful strike. Likewise the German commander would defend against those hits with seven dice of his own needing a similar score to cancel out successful British hits.
If the defence scored more that the attack then no effect was caused, however equal or more successful hits had consequences for the target vehicle with more hits causing worse likely consequences.
 |
| Lance Sergeant Baskeyfield directs the fire of one of his 6lbr gun with telling effect |
In addition to the the gun fire, the personal direction of Baskeyfield himself, bringing his "Ace" gunnery attributes, meant that the British gun was very unlikely to miss even when taking un-aimed snap shots and so all three StuGs were brought under very accurate fire with each activation.
 |
| The StuGs feel the effect of the 6lbr with the one in the centre knocked out, the one on the left immobilised and shocked and the the right most vehicle with a damaged main gun. |
The two turns followed by a similar activation in the next phase without any return fire from the StuG's due to the appearance of the "Tea Break" or end of turn card before the StuG activation card could appear left the German armour line looking rather battered with the commander's vehicle in the centre knocked out and burning and the other two vehicles with damaged engines and main guns.
 |
| The view from Baskeyfield's tree |
The German personal morale was under severe pressure with the battering of their armour coming at them from Baskeyfield and his gun.
They were desperately waiting for the opportunity to activate both the infantry and StuG platoons and were calling for mortar support.
Suddenly the StuG card appeared and their commander Scharfuhrer Alois Schatz, who was able to survive the destruction of his vehicle, losing one of his crew, managed to de-bus to the one vehicle with a main gun operating. The two remaining StuGs then poured on a stream of vehicle machine gun fire that supported by the fire from the German infantry moving through them soon knocked out the crew of the 6lbr leaving Baskeyfield as the sole survivor.
 |
| With Baskeyfield and his men dead and wounded around their gun, top right, SS Sturmscharfuhrer (RSM) Artur Spengler moves his first first zug around the British right flank and comes under small arms fire from the buildings. German mortar fires starts to land on the buildings to their right. |
With the battle under way north of the road
SS Sturmscharfuhrer Artur Spengler was urging his other platoon forward looking to flank the the road junction and turn any British position in the houses and gardens. As he men drew into effective small arms range, the first German 81mm mortar shells landed in the line of houses to their front.
 |
| 11th Para infantry are forced to move from building to building as their position comes under intense mortar and StuG high explosive fire, setting the houses alight |
The men of 11th Para were waiting patiently as the SS infantry got ever closer and the first SS section reeled and desperately sought any cover going as three of their number were killed in the first fusillade of Bren and Lee Enfield .303 fire adding three shocks for good measure.
 |
| The SS infantry are still coming under heavy small arms fire as they close on the British position, three dead, three shocks - ouch! |
The threat posed by Baskeyfield was still potent as the game moved into another turn. The British commander was still very capable of firing his gun single handed as he did in reality and both sides were in eager anticipation as the next card was drawn.
The Germans needed no further invitation as the SS infantry opposite Baskeyfield's position used their card to close in on and shoot up the British gun position killing our hero in the process.
A combination of StuG and mortar fire took out one of the Para sections and badly damaged a second adding multiple shocks, whilst the second British AT gun was overwhelmed by a close assault from
Spengler's platoon, forcing the surviving Paras to surrender their hold on the junction and fall back to the perimeter.
 |
| The final moments as the survivors of 11th Para are forced back from the road junction to join their comrades further back on the perimeter |
This proved to be a very well balanced and exciting scenario with twists and turns throughout generated by the excellent card play and rules set that is IABSM. We came away with plenty of "what ifs?" following our game which might have given a different result had the British delayed opening fire with Baskeyfield for another turn. What might have been the effect of the second gun being better sighted to support the other.
Of course the unpredictability of the cards would cause this very same set up to potentially play quite differently, not to mention the combat outcomes we generated.
A great day of wargaming was had and thanks to Charlie, Steve, Ian and Jack for providing the entertainment and I hope this game in a small way pays a very sincere tribute to a very brave soldier whose final resting place is unknown but whose memory is not forgotten.
 |
Statue to John Baskeyfield unveiled in his home
town of Stoke on Trent in 1990 |
Sources referred to in this post:


