

Another year almost done and here we are in December 2016 with the traditional "Big Club Game" at the DWG, where we all come together in one final game of the year.
This year's theme is the Dark Ages and we decided to bring together the members vast collections of 28mm figures with those not having this period putting together some units for the game.
The rules chosen were Dux Britanniarum from the Too Fat Lardies and the game follows on from the play test we ran last month which was very useful in helping to decide the format for this final game.
A Gathering of Ravens at Littleham Cross

With sides activations being governed by card draw we tried using one deck to govern one large game on one table, but trying to organise wargamers is like herding cats and so we changed the format to the one outlined here.
If you are interested in running something similar, our game organiser Nick put together a briefing plus the event cards and game markers we used to add a little extra spice to the game, and I have copied that information here for reference.
 |
| The club gathers on Saturday morning with plenty of casual chat as the four game tables are created |
So to set the scene for our big game, the West Saxon King Cenwalh (Vince) has gathered his warriors plus about thirty ships to support a thrust into the British Kingdom of Dumnonia ruled over by King Geraint (Chas) who has his capital in Exeter.
The Britons have been licking their wounds since Cenwalh's punishing raid earlier in the year and were determined to defend their lands should the Saxon barbarians return, thus the call to arms was answered readily when cavalry patrols along the River Axe contacted the West Saxon army and spotted their support ships creeping along the Dumnonian shore towards the Exe estuary.
 |
| As this is our Xmas Seasonal Game there is always plenty of provisions on hand |
The West Saxons were concentrated close to the little village of Littleham-Cross and its church just south of Exeter when the Britons moved out to meet the raiders.
 |
| A little map to help set the scene and context for our game |
For our battle, the plan was to go back to using the scenarios as laid out in the "Dux Brit" rules, by setting up four separate but linked tables with victory points gathered on each adding into a total that would decide the outcome of the overall battle.
Thus each table was a small battle with in the larger clash and each table had its own card deck dealt out to the players involved.
If a player moved his forces off table in a march to join the combat on another table he would leave his cards on the former and be dealt new ones on joining the latter once having successfully tested to arrive.
Thus each of our opposing Kings could redirect his forces as required and each would decide how many forces to allocate to each table at the start of our game. Thus on Table 4, Slave Run, we had three Saxon players up against one Briton, who received reinforcements throughout the day as the Britons fought to get control of other tables.
The tables and the scenario plan follow, together with the event cards and game markers we used.
1
The Village
|
2
The Battle
|
3
Take the Church
|
4
Slave Run.
|
 |
| Table 3. "Take the Church" takes shape |
Table 1: Loot the village
Both sides to loot and attack the village.
- Wagon = 10 points
- Big Barrel = 5 points
- Small Barrel = 2 points
- Animals = 5 points
attacker, the winner of the combat takes the loot.
Table 1: layout
This table should have a stone wall around the outside of the village, with animal pens inside the
village. The village should also have streets/roads inside the village with buildings running
alongside and dotted around inside the village wall.
Looting
Any unit under the control of a player can try to loot a building or animal pens, only one unit can
enter a building to search for loot.
Dice roll: 1x D6 (When checking for loot the unit which is checking cannot carry out any other
action that turn.)
Roll of 6 = Finds loot( roll a D3, 1 = small barrel, 2 = Big Barrel, 3 = Wagon
Roll of 1 = No loot in the building or the pen.
 |
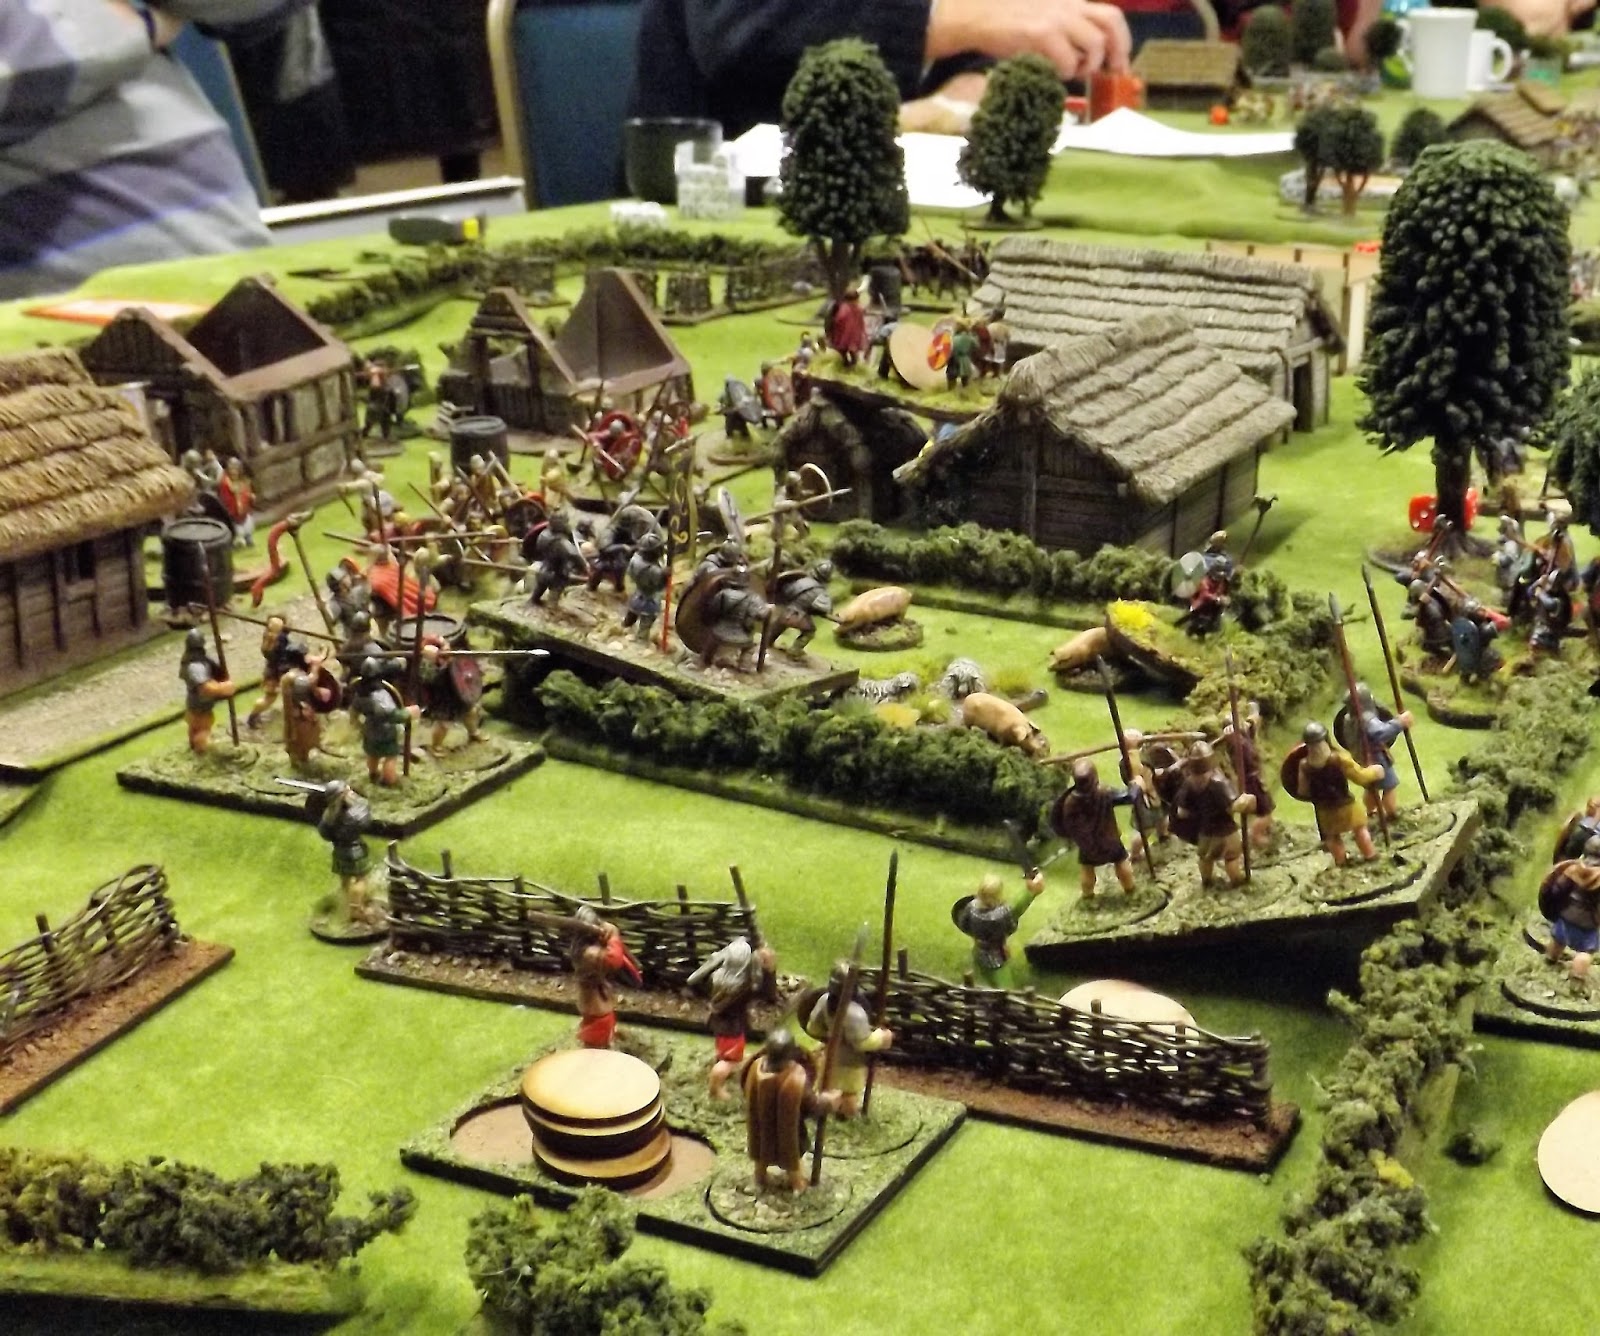
| Table 1. The Village otherwise known as Littleham Cross |
Table 2 Battle.
As listed in the Dux rule book
Table 2: layout
This table needs to be mirrored for each side, so that the battle ground is fair for both sides, the
table should include hills, roads and trees and maybe a few walls, but there should be no buildings
on this table.
Points and killing
The Side which is holding the battleground at the close of play gets 25 points.
3 points for killing
|
2 points for killing
|
1 point for killing
|
Lord
Elite Unit
Shock Cavalry
Noble Raider Cavalry
|
Noble
Warrior Unit
Raiders
Raider Cavalry
|
Levy Unit
Missile unit
Skirmisher unit
Skirmisher Cavalry
|
 |
| All set to go with Table 4. "Slave Run" closest to camera |
Table 3: The Church
Both sides want to take and hold the Church and the grounds.
- Each turn of the Lords card in control of the church 5 points.
- Each turn of the Lords card in control of the church grounds 2 points.
wanting to make fun or make a funny face at the British player could get extra points.)
As above for the British players:
Only one unit can be inside the church, only one unit can attack the church (There is only one
doorway into the church.)
Table 3: layout
The Church should be in the middle of the table on a hill with a wall, hedge or fence around the
church and the grounds, a road should be running from both sides to the church. There should also
be small low lying hills and small groups of trees.
Looting
There is nothing to loot,
 |
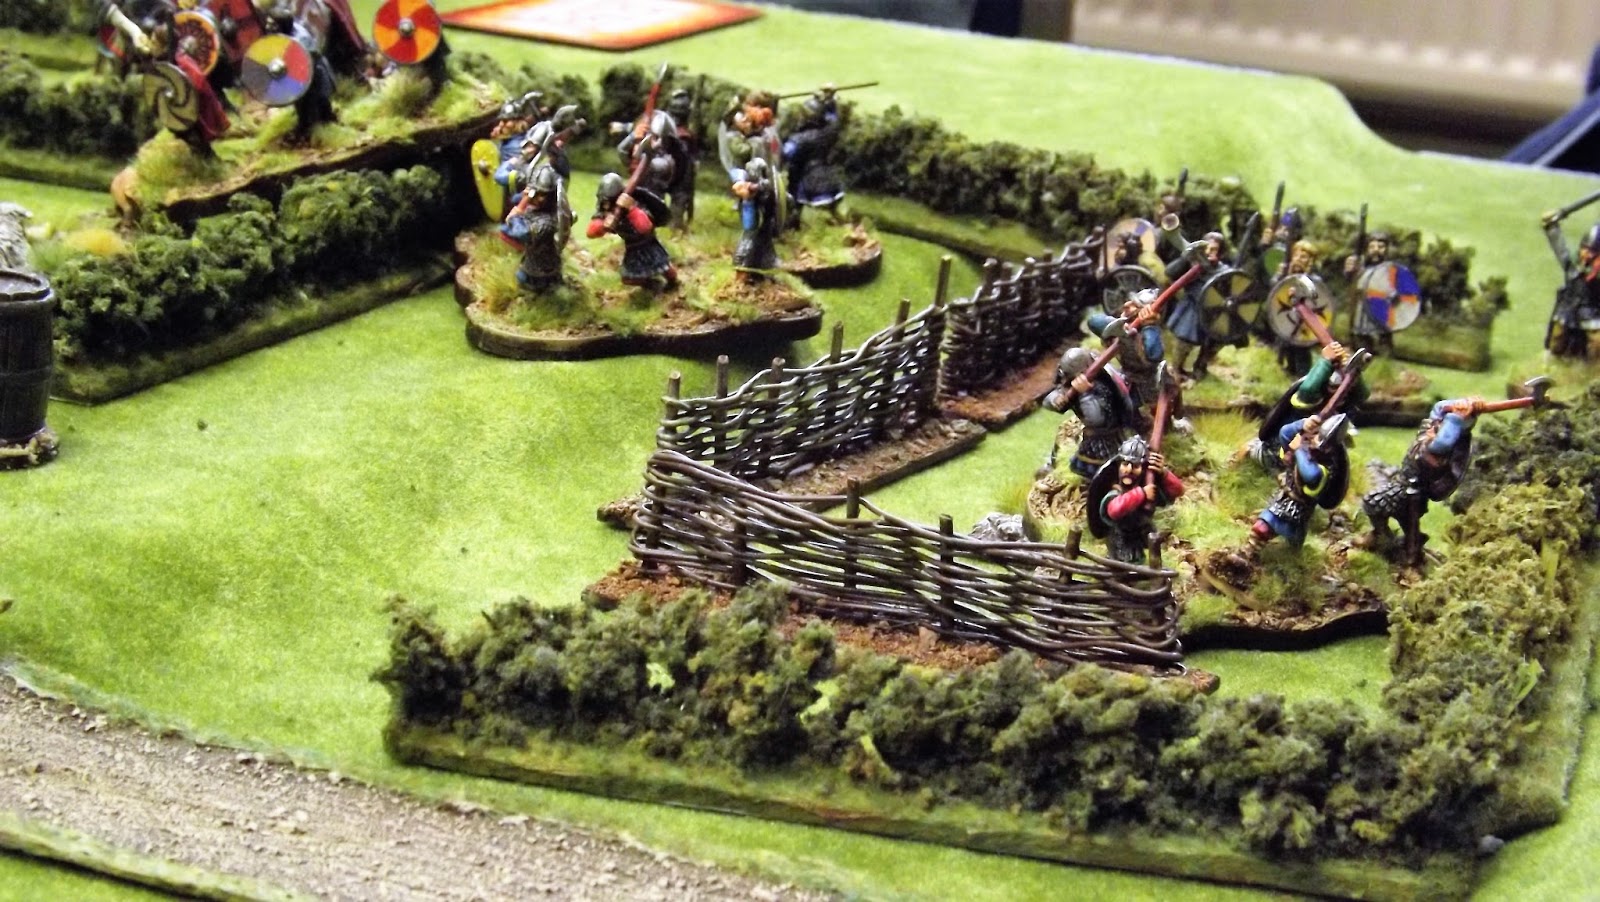
| Saxon raiders approach the hamlet on the coast looking for slaves |
Table 4: layout
There should be buildings dotted around the table where the slaves could be hiding, with small low
laying hills and small groups of trees, roads should also be placed.
Looting
Finding a slave works in the same way as looting a building, but there is no D3 roll as all slaves have
the same value in points.
If any unit is attacked when taking slaves to their table edge, the slave makes a break for freedom
and runs off. The unit losing the slave can start a new search if the unit is in a fit state.
 |
| The Britons on the far slopes gather ready to defend their coastline, note the scantily clad modest young lady at the back acting as the Britons slave marker. |
Notes for all tables
- All cavalry can charge even with shock, but not with excess shock.
- Killing a religious leader: 10 points
Any player can leave the table to try to move to a new table, to carry this out the Lord figure need
to move to the table edge that is next to the table the player is playing on, and the player must say
that he wants to join the new table. When this happens a D6 is rolled.
D6 Roll
6/5 = move on to the other table on that edge ( all cards which that player holds are left on the
table and new cards can be drawn on the new table when the Lords card is played again.)
A local peasant mislead you and your troops and sent you the wrong way, the same peasant also
ran off with your pet dog and has set up a love nest with your lover. Your side also lose 10 points.
4 = Move to table 4 leave cards behind and draw new cards on the next lords card,
3 = Move to table 3 leave cards behind and draw new cards on the next lords card,
2 = Move to table 2 leave cards behind and draw new cards on the next lords card,
1 = Move to table 1 leave cards behind and draw new cards on the next lords card,
Re-rolls
A player can re-roll by asking a new peasant, but at a risk of losing 10 more points if a 6 or a 5 is not
rolled.
 |
| Opposing forces move into Littleham |
 |
| The extra 'Event Cards' that were added to our game |
 |
| A cagey opening here on Table 2. "The Battle" |

 |
| Saxon cavalry support the infantry attack on Littleham Church |

 |
| West Saxon raiders enter the church grounds |
 |
| These are the markers we handed out to players on completion of an objective which was handed to the umpire to add the points to the force total |
 |
| The Britons advance to meet the invaders |
What proved to be one of the most interesting aspects of playing a multi-scenario game like this was the decisions of the respective commanders to allocate their forces at the start.
As the maxim holds true "he who defends everything, defends nothing" the commanders sought to gain the ascendancy on tables they thought could give them the maximum return whilst seeking to hold back the enemy on others and frustrate their attempts.
 |
| Close terrain in Littleham |
 |
| The Britons fight to defend the village |
The added spice of various event cards given out to respective players meant that best laid plans could still go wrong as those players responded to events that their comrades were not necessarily aware of.
 |
| The lines draw near on Table 3 at the church |

As is ever the case with big game battles, you are really only aware of what was going on in your particular area, with awareness of the occasional cheer further along the table as one side or another gained an objective or won a major fight.
Even as your roving reporter I still only have a vague impression of what was going from one table to another, an impression that is even more unreliable as I write this report twenty-four hours after the event; and you quickly understand why reports of real battles by limited observers throughout history have so many inconsistencies and inaccuracies.
 |
| British cavalry take a hand on Table 4 during the Slave Run battle |
 |
| Thoughts of taking slaves diminish as the need to kill or be killed takes over |
On my particular table, Table 4 Slave Run, we three Saxon commanders grabbed two slaves cowering in the orchards and hovels of the hamlet we encountered and they were quickly shepherded to the boats.
Then as our opposing Briton commander, Jack, moved into the hamlet gathering slaves of his own (he obviously didn't hail from this particular village), the two sides stopped slave hunting and moved rapidly into close combat, that developed into a struggle all afternoon as the King of the Britons continuously fed in reinforcements to tie the Saxons down and prevent their slave hunting activities.
 |
| The Britons prepare to receive cavalry on Table 3 at the church |
 |
| The battle on Table 4 really hots up as more British cavalry enter the fray |
Destroying enemy units was quite satisfying, but often distracting from the real objectives that would net the most points and so it was that the Britons score board just kept turning over.
 |
| Fighting on the Slave Run table under the watchful eye of a British shield wall on the slopes above |
The two tables the men of Wessex were focused on, namely Tables 1 and 4 proved very difficult to get a hold on and indeed the Britons were well on top on Table 1 at the close of play.
 |
| The lines clash on Table 2 at 'The Battle' |
Frustration at events only increased on Table 4 as the enraged peasants aggrieved at being rounded up for a life of slavery started to attack their attackers and whilst destroying one of these enraged mobs I ended up losing three of my elite warriors for absolutely no gain to the scoreboard for ruthlessly destroying the mob. C'est la guerre!
 |
| The Britons start to gain the upper hand on Table 1 in Littleham |
 |
| No quarter asked or given on Table 4 as the villagers angered at being enslaved attack any strangers at will |
 |
| Table 4 and both sides have fought each other to a standstill |
 |
| British Cavalry just kept on attacking |
 |
| The Clergy attempt to rescue valuables as both sides clash around the church |
 |
| The Britons start to mop up in Littleham Village as the West Saxons reel under the pressure |
We played from midday through to just after four pm and with the bar beckoning and a score board that clearly showed the day was the Britons the men of Wessex fell back to the boats and the River Axe well and truly beaten with 355 points versus 240 points.
 |
| The Skittles score board looks ominous for the men of Wessex. I rather think the 'Valiant Brits' should have been scored under the home team. |
 |
| Still the Saxons keep fighting around the Church |
 |
| They think it's all over - it is now! The Britons clear Littleham of the invaders |
As usual much fun was had by all and we had a great turn out for the day with a club that has grown with new members joining throughout the year.
 |
| The Devon Wargames Group 2016 |
Many thanks to Nick, Jason and Steve L for organising a great day's entertainment and to all the members of the Devon Wargames Group for creating all the fun in this game and all the games held this year.
On behalf of the club we wish everyone a very happy and peaceful Christmas holiday and look forward to another fun year of wargames in 2017.